How to Dunk a Basketball: The Progression That Actually Works
Dunking comes down to one number: your standing reach plus your vertical jump needs to hit about 126 inches. The rim is 120 inches, and you need roughly 6 inches above it to put a ball through cleanly. Close the gap with a staged progression: graze the rim, grab the rim, dunk a tennis ball, then a small ball, then a full-size ball. Measure your vertical first so you know exactly how far you have to go.
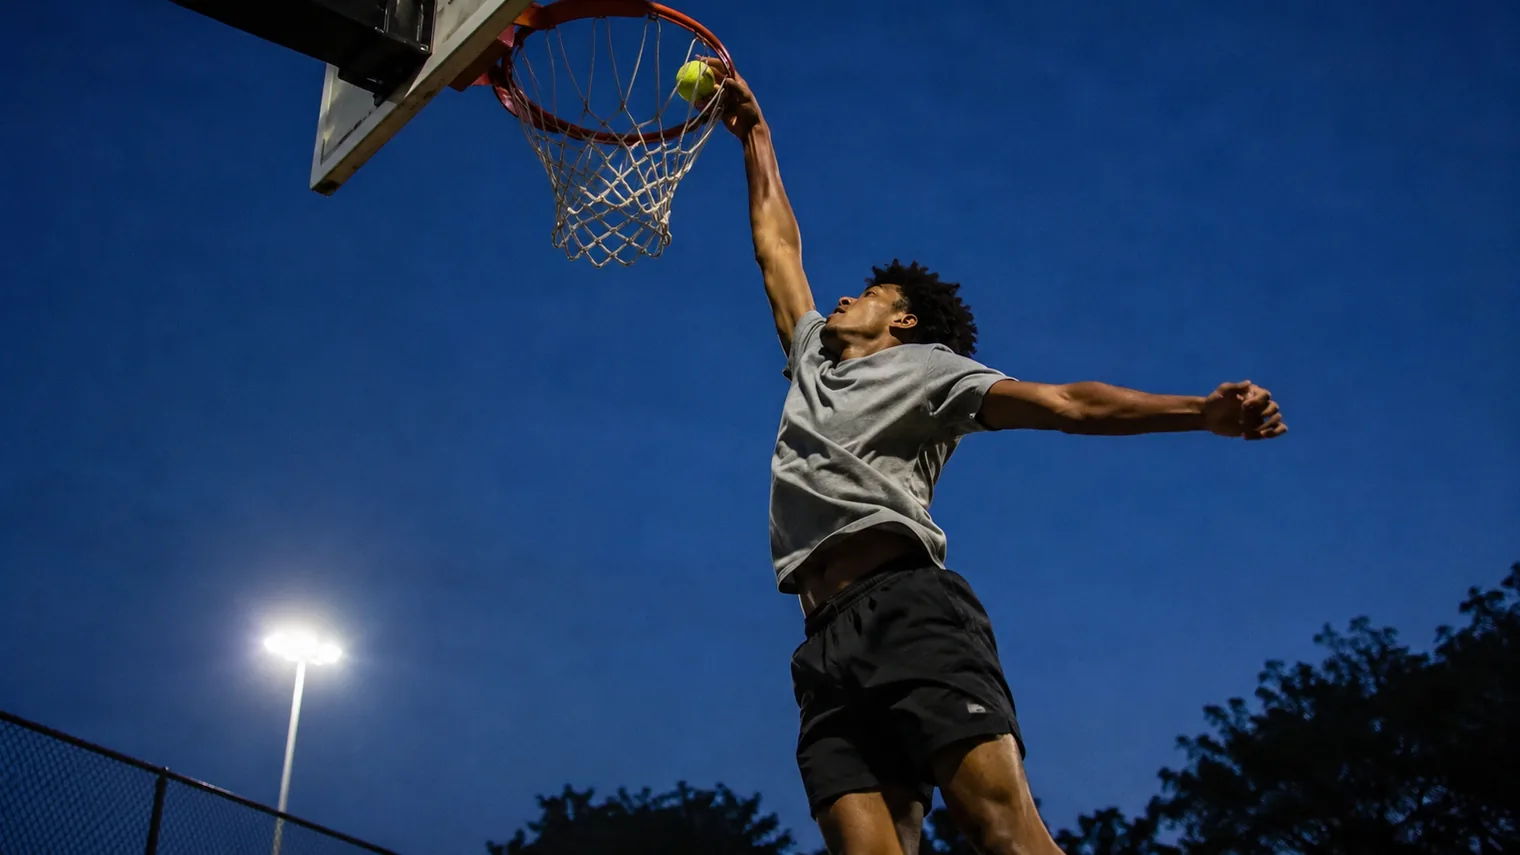
What a dunk actually requires
Every regulation rim, from your local gym to the NBA, sits at 10 feet (120 inches). Touching the rim is not dunking, though. To put a ball through, your hand has to carry the ball over the front of the rim, which in practice means getting your palm roughly 6 inches above it. So the working target for a clean, comfortable dunk is a touch height of about 126 inches.
Here is the part most guides skip: your standing reach matters as much as your vertical. Touch height is standing reach plus jump height, so two players with identical 30-inch verticals can be in completely different situations. A 6'4" player with an 8'6" reach dunks easily; a 5'9" player with a 7'6" reach is still several inches short of the rim. That is why "what vertical do you need to dunk" has no single answer. The formula is simple:
- Vertical needed = 126 inches minus your standing reach.
- Standing reach 8'0" (96 in) → you need about a 30-inch vertical.
- Standing reach 7'8" (92 in) → you need about 34 inches.
- Standing reach 7'4" (88 in) → you need about 38 inches, which is elite territory.
Before you train a single rep, get your two numbers. Our free vertical jump test takes your standing reach and jump-touch height and gives you a straight dunk verdict, and the full math, with worked examples by height, lives in what vertical do you need to dunk.
The dunk progression: six stages from rim graze to throwdown
Nobody goes from touching net to dunking a regulation ball in one leap. The players who get there work through stages, and each stage tells you something real about where you are. Skipping stages does not speed things up; it just means you spend months missing dunks you were never close to making.
Stage 1: Graze the rim
Fingertips brushing the rim off your best approach. This proves your max touch is at or near 120 inches. If you cannot graze the rim yet, your work is not dunk practice at all, it is jump training. Move to a real program to increase your vertical and come back when you can touch iron.
Stage 2: Grab the rim
Wrapping your fingers over the rim and holding it for a beat. This proves you can get your whole hand above the cylinder, not just a fingertip on your one perfect jump. You are ready for the next stage when you can grab the rim on most attempts, not one attempt in ten.
Stage 3: Control a small ball in one hand
Before you dunk anything, you need one hand that can carry an object up through a full-speed jump. A tennis ball is the standard tool because anyone can grip it. Practice full approaches where you jump with the ball held high and slap it through the rim. This stage is about timing: coordinating the approach, the jump, and the arm extension with something in your hand, which feels surprisingly different from jumping empty-handed.
Stage 4: Dunk the tennis ball
A clean tennis ball dunk off your preferred takeoff proves your touch height is genuinely above the rim with cargo. Most people find they jump 1–2 inches lower with a ball in hand than empty-handed, so this stage confirms your usable jump, not your best-ever touch.
Stage 5: Dunk a volleyball or youth basketball
Step up to something with real size: a volleyball (about 26 inches around) or a 27.5-inch youth basketball. These are big enough to force real rim technique, small enough that most hands can control them without palming. When you can dunk one of these on most attempts, you are one grip problem and an inch or two away from the real thing.
Stage 6: Dunk the full-size ball
A men's regulation ball is 29.5 inches around; the women's ball is 28.5. Start with one-hand attempts off a small bounce or a self-lob so the ball arrives at the top of your jump, then progress to carrying it up from the floor. The first make is usually ugly. That counts. Everything after that is reps.
Technique: how to actually get up
One foot or two feet?
This is the first fork in the road, and the honest answer is: test both, then train your natural side while keeping the other in your pocket.
- One-foot jumping comes off a running approach and rewards speed and springy, elastic ankles. Lighter, quicker athletes usually get higher this way, and it lets you attack the rim in stride, which is how most in-game dunks happen.
- Two-foot jumping plants both feet and rewards raw strength and a deep, powerful dip. Stronger, heavier athletes often get higher this way, and it gives you more balance and control at the rim, which matters when you are carrying a ball.
A quick self-test: do several max jumps each way at the rim and compare where you touch. Most people have a clear natural side within ten jumps.
The approach and the penultimate step
Speed only helps if you can convert it upward, and the conversion happens in the last two steps. The second-to-last step, the penultimate step, should be your longest and lowest: you step long, drop your hips, and load your legs like a spring. The final step is short and quick, punching the ground to redirect all that forward speed into height. Untrained jumpers do the opposite, staying tall and taking a long last step, which kills the jump before it starts.
Approach the rim at a slight angle rather than dead straight on. An angled approach keeps your body from drifting under the backboard and gives your jumping-side shoulder a clean line to the rim. Start with a relaxed 4–6 step approach at about three-quarters speed; a sprint you cannot control is worth less than a smooth build you can.
Ball control at the rim
One-hand dunks are the realistic first target, because your one-arm reach is several inches higher than what you get stretching two hands up together. Two-hand dunks demand noticeably more height, so save them for later. On the way up, keep the ball tight to your body until your jump peaks, then extend and push it down through the rim. Extending early wastes reach and gets you rim-checked.
Timing
The ball should be at its highest exactly when you are. Common timing faults: bringing the ball up too early (it stalls above your head and slows your arm swing), and jumping too far from the rim (you peak on the way in, not at the rim). Fix both with tennis-ball reps: full approach, ball high at the peak, slap it through. Timing is a skill, and it improves faster than your vertical does.
How to palm a basketball (and why you might not need to)
Palming, holding the ball one-handed by grip alone, makes dunking dramatically easier, so it is worth an honest look. The uncomfortable truth first: palming is mostly hand size. Players with long fingers and wide hand spans can palm a ball with little practice; players with average hands may never palm a dry, game-worn ball reliably no matter how much they train. Grip training helps around the edges, but it cannot make your hand bigger.
What actually helps, in order of impact:
- Use a ball with fresh, tacky grip. A new or well-kept ball is far easier to palm than a worn, dusty one. Many players who "can't palm" have only tried with a dead outdoor ball.
- Practice the claw. Spread your fingers wide and grip with fingertips and pads, not the palm itself. Carry the ball around the house this way; pick it up off the floor with one hand until it feels normal.
- Train fingertip and forearm strength. Fingertip push-up holds, plate pinches, and grip trainers add a real but modest margin. Think of it as a few percent more security, not a new ability.
And here is the part that should take the pressure off: you do not need to palm the ball to dunk. Most first dunks happen without it. The main workarounds:
- The cradle: carry the ball pressed between your hand and your wrist or forearm on the way up, then roll it onto your hand at the top. This is how most average-handed dunkers control a full-size ball.
- The self-lob: toss the ball up off the bounce or off the backboard so it arrives soft at the top of your jump, where a light one-hand push finishes it.
- The smaller ball: the progression above exists precisely so grip is never the thing blocking you. Get the height and timing with a ball you can control, then solve the grip problem last.
How long it really takes
Here is the honest math. Most beginners who train consistently add 2–4 inches of vertical in their first year, and young or very untrained athletes sometimes see more; intermediates fight for 1–3, and advanced jumpers for fractions of an inch. So the timeline depends almost entirely on your starting gap:
| Where you are now | Realistic timeline |
|---|---|
| Grabbing the rim consistently | 6–12 months |
| Grazing the rim | 1–2 years |
| 2–4 inches below the rim | 2–3 years |
| 6+ inches below the rim | Several years, honestly |
For context, the average untrained adult male vertical is around 16–20 inches, and most men need roughly 30–36 inches to dunk depending on reach. That gap is why dunking is rare, and why it is a genuinely satisfying goal: it is earned. If you want to see what the far end of the range looks like, the highest verticals ever recorded put the whole scale in perspective.
The mistakes that stretch these timelines out:
- Jump training with no strength base. Endless max jumps without squats and hinges is revving an engine you never built. Strength gives you force; jumping teaches you to use it fast. You need both, and the full breakdown is in our guide to increasing your vertical.
- Testing and practicing fatigued. Tired jumps are lower jumps, and they groove sloppy timing. Dunk practice belongs at the start of a session, fresh, with full recovery between attempts.
- Chasing hype programs. Anything promising 10 inches in weeks is marketing. The physiology of strength and tendon adaptation runs on a 6–8 week clock at minimum, and no PDF changes that.
- Never re-measuring. Re-test every 6–8 weeks so you can see the gap closing. Measure your vertical at home the same way each time so the comparison is real.
Landing: the part that keeps you dunking
Dunk attempts are max-effort jumps near a metal rim, so give landing thirty seconds of respect. Land on both feet with bent knees and hips, absorbing quietly, rather than stiff-legged on one leg. If an attempt goes sideways, holding the rim briefly to steady yourself is smarter than fighting an off-balance fall. Keep max attempts to a handful per session with full rest between them; your patellar and Achilles tendons take the bill for high jump volume, and an aching tendon that lingers for days is a stop sign, not something to push through.