How to Measure Your Vertical Jump at Home (With or Without Equipment)
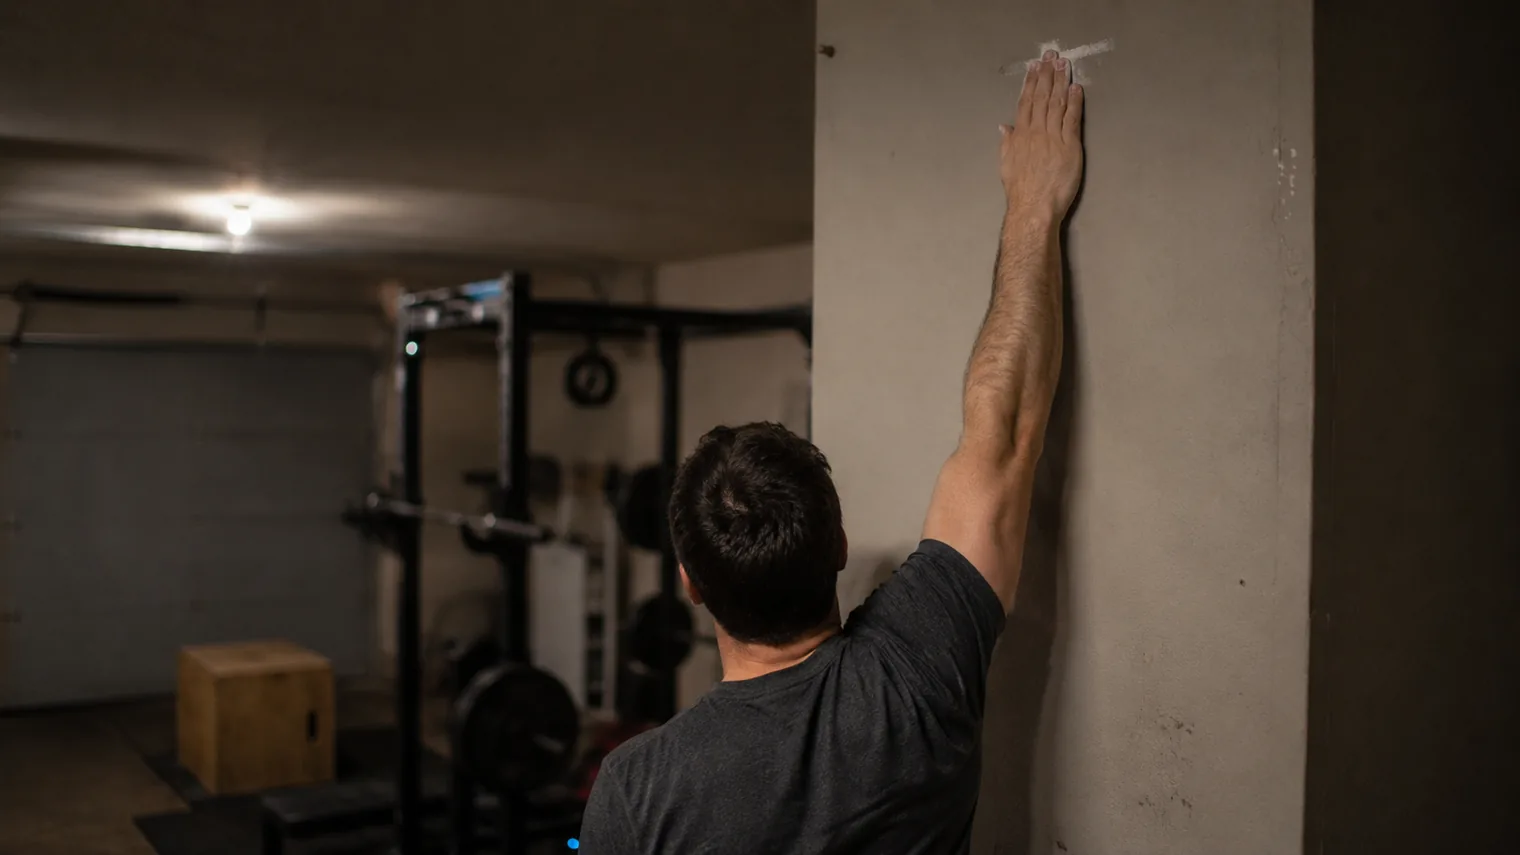
Stand side-on to a wall and mark your standing reach with one arm fully extended overhead. Then chalk your fingertips, jump, and tap the wall at the top. Measure the gap between the two marks: that distance is your vertical jump. The wall-and-chalk method is free and accurate to about an inch. Apps and jump mats are more precise.
What a vertical jump actually measures
Your vertical jump is the difference between how high you can touch standing still and how high you can touch at the peak of a jump. It is not how high your feet leave the ground; it is how much higher your hand reaches.
That distinction matters because every honest measurement uses the same two numbers: your standing reach (one arm stretched straight up, feet flat) and your jump-touch height (the highest point your fingertips reach in the air). Subtract the first from the second and you have your vertical. A tall person with long arms is not "cheating" the test, because their longer reach is already baked into the standing-reach number you subtract out. Everyone is measured against their own reach.
The wall-and-chalk method, step by step
This is the most reliable free method, and it gets you within roughly an inch of a gym-grade device. You need a tall wall with clearance overhead, a piece of chalk or a damp finger, and a tape measure.
Step 1: Measure your standing reach
Stand side-on with your shoulder a few inches from the wall, feet flat, and reach straight up with the hand closest to the wall. Mark the wall at the tip of your longest finger. Keep both heels on the floor; rising onto your toes inflates the number and shrinks your apparent jump. Measure from the floor to that mark and write it down (for example, 90 inches, or 229 cm).
Step 2: Chalk up and jump
Rub chalk on the fingertips of your reaching hand. Stand in the same spot, jump as high as you can, and slap the wall at the top of your leap with those fingertips. The chalk leaves a clear smudge at your peak. Jump straight up so your hand stays close to the wall; drifting sideways or away from the wall costs you contact at the real high point.
Step 3: Measure the gap
Measure from the floor to the chalk smudge, then subtract your standing reach. If your jump-touch is 114 inches and your standing reach is 90 inches, your vertical is 24 inches (61 cm). That gap, not the touch height, is your score.
How many attempts, and best vs. average
Take three to five jumps with full rest between them, about 30 to 60 seconds, so fatigue does not drag the number down. Record your single best jump for a max-vertical figure, which is the standard for comparing yourself to athletes and to our by-age and by-sport charts. If you want a number that reflects how you actually perform on a typical rep, average your attempts instead. Just be consistent so retests are comparable.
Standing vertical vs. approach vertical
A standing (no-step) vertical is measured from a still start with no run-up. An approach (running) vertical lets you take a few steps and is usually 2 to 6 inches higher because you convert horizontal speed into lift.
The standing vertical is the cleaner, more comparable test, and it is what most norms and combine-style numbers refer to. Record your standing vertical as your baseline. Track your approach vertical separately if your sport involves running takeoffs, like a volleyball spike or a basketball layup, but never compare a running number to someone else's standing number. They are different tests.
Measuring with your phone
Flight-time apps estimate your jump by timing how long your feet are off the ground, then converting that hang time into height with physics. They are convenient and surprisingly close for tracking progress, but they measure something slightly different from the wall method.
Because these apps calculate height from airtime, anything that changes your airtime fools them. Tucking your knees, pointing your toes on landing, or landing in a deep crouch all extend hang time and can inflate the reading by an inch or more. For consistent results, land the way you took off, with similar leg position, and film on a stable surface in good light. A phone app is fine for week-to-week tracking; it is not as trustworthy as a wall mark for an absolute number, and nowhere near a force plate for precision.
Jump mats and contact mats
A jump mat (also called a contact mat) is a pressure-sensitive pad that times your flight the instant your feet leave and land, then displays a height. It is the same flight-time math an app uses, but with cleaner timing because the mat senses contact directly instead of guessing from video.
Mats are popular with coaches because they are quick, repeatable, and good for testing a whole team. They share the app's weakness, though: they measure airtime, so a knee tuck still adds phantom inches. Test with a consistent body position and the numbers stay honest.
The Vertec (gym and combine standard)
A Vertec is the rotating-vane device you see at combines and gyms. You swat away plastic vanes at the top of your jump, and the highest vane you move marks your reach height. It measures the same thing the wall does, an actual touch height, so it correlates closely with the wall-and-chalk result.
Its advantage is speed and a clear readout with no chalk cleanup. Its main error source is the same as the wall: if your hand drifts away from the vanes, or your standing reach was measured sloppily, the result is off. Set up your standing reach on the Vertec carefully and the number is solid.
Force plates (the lab gold standard)
Force plates measure the force your body puts into the ground and calculate jump height from your takeoff velocity. They are the most accurate option and also reveal power, force, and how evenly your legs contribute, which a tape measure cannot show.
They live in labs and high-performance facilities and cost far more than any home setup, so they are not realistic for measuring at home. If you ever get tested on one, treat that number as your most reliable reading.
Accuracy comparison
No home method is perfect, but they fail in different ways. Here is how the common options stack up.
| Method | Accuracy | Cost & access |
|---|---|---|
| Wall & chalk | Good (about ±1 in) | Free; any tall wall |
| Phone flight-time app | Fair; airtime tricks inflate it | Low; free or cheap apps |
| Jump / contact mat | Good; cleaner timing than an app | Moderate; sold for coaches |
| Vertec | Very good; direct touch height | Higher; gyms and combines |
| Force plate | Excellent (lab gold standard) | High; labs and facilities |
How to measure your standing reach alone
You can capture an accurate standing reach by yourself with chalk, no helper needed. Chalk your fingertips, stand side-on to the wall with feet flat, reach straight up, and press your fingers to the wall to leave a mark at full extension.
Keep both heels down and do not shrug the shoulder up artificially; just a tall, natural reach. Then measure from the floor to the mark with a tape measure. If you cannot reach a tape that high alone, stick a small piece of tape at the mark, measure to a known low point you can reach, and add a measured offset. Lock this number in once and reuse it, since your standing reach barely changes between tests.
Common mistakes that inflate or deflate your number
Most bad readings come from a handful of repeatable errors. Fix these and your number becomes trustworthy and comparable over time.
- Rising onto your toes during standing reach. This raises the reach you subtract, which falsely shrinks your vertical. Keep heels flat.
- Drifting away from the wall in the air. Your hand misses the true peak, deflating the score. Jump straight up.
- Tucking knees on app or mat tests. Extra airtime inflates flight-time readings. Land like you took off.
- Not warming up. A cold test underrates you. Do a few light jumps first.
- One single attempt. You rarely hit your best on the first try. Take three to five and keep your top jump.
- Switching methods between tests. An app and a wall measure differently, so progress looks like noise. Pick one method and stay with it.
Is your vertical any good?
A typical adult male sits around 16 to 20 inches and a typical adult female around 12 to 16 inches; elite numbers run 28+ inches for men and 24+ inches for women. Where you land depends heavily on age and sport.
For a teenager, a 16 to 18-year-old male averaging 16 to 20 inches is right on track, while a 19 to 25-year-old male typically lands at 18 to 22 inches. Sport context shifts the bar too: basketball players commonly test 22 to 28 inches and volleyball players 19 to 26 inches. To see exactly where your number falls, check the full breakdowns by age and by sport, then use the training guide if you want to add inches.